

Are you looking for a fun and unique way to tap into your creative side? Look no further than cardboard sculpting! With just a few simple materials and some imagination, you can create stunning sculptures that will amaze and impress your friends and family.
In this article, we'll explore the basics of cardboard sculpting, from choosing the right materials to sketching out your design and bringing it to life. Whether you're a seasoned artist or a beginner looking to try something new, cardboard sculpting is a fun and accessible way to unleash your creativity and produce beautiful works of art. So grab some cardboard, scissors, and glue, and let's get started on your journey to becoming a cardboard sculpting master!
Benefits of Creating Cardboard Sculptures
Cardboard sculpting is a great way to express your creativity and let your imagination run wild. One of the biggest benefits of creating cardboard sculptures is that it's an inexpensive and easy way to get started with sculpture. Unlike other forms of sculpting, such as carving or casting, cardboard sculpting doesn't require any special tools or equipment. All you need is some cardboard, scissors, and glue, and you're ready to go.
Another benefit of cardboard sculpting is that it's a very forgiving medium. If you make a mistake or don't like the way something looks, you can simply cut off the offending piece of cardboard and start over. This makes cardboard sculpting a great way to experiment and try new things without worrying about ruining expensive materials.
Finally, cardboard sculpting is a great way to recycle and repurpose materials that would otherwise end up in the trash. By creating beautiful sculptures out of cardboard, you're not only expressing your creativity, but you're also doing your part to help the environment.

Tools and Materials Needed for Creating Cardboard Sculptures
One of the great things about cardboard sculpting is that you don't need a lot of fancy tools or materials to get started. Here's a list of the basic tools and materials you'll need:
- Cardboard: You can use any type of cardboard, from old boxes to cereal boxes. Just make sure it's clean and free of any debris.
- Scissors: A good pair of scissors is essential for cutting cardboard. Look for a pair that's sharp and comfortable to hold.
- Glue: You can use any type of glue for cardboard sculpting, but a hot glue gun is ideal. It dries quickly and creates a strong bond.
- Ruler: A ruler will come in handy for measuring and cutting straight lines.
- Pencil: A pencil is useful for sketching out your design before you start cutting.
Once you have your tools and materials, you're ready to start creating your cardboard sculpture.

Techniques for Creating Cardboard Sculptures
There are a few techniques you'll need to master in order to create a successful cardboard sculpture. The first is cutting. Cardboard can be tricky to cut, especially if you're trying to create intricate shapes. Make sure your scissors are sharp and take your time when cutting.
The second technique is folding. Cardboard can be folded in a variety of ways to create interesting shapes and textures. Experiment with different types of folds to see what works best for your design.
The third technique is gluing. When gluing cardboard, it's important to use just enough glue to create a strong bond without making a mess. A hot glue gun is ideal for cardboard sculpting because it dries quickly and creates a strong bond.
Finally, it's important to be patient and take your time. Creating a cardboard sculpture can be a time-consuming process, but the end result is worth it.

Tips for Designing and Planning Your Cardboard Sculpture
Before you start cutting and gluing, it's important to have a clear plan for your cardboard sculpture. Here are some tips to help you get started:
- Sketch out your design: Use a pencil and paper to sketch out your design before you start cutting. This will help you visualize your sculpture and make any necessary changes before you start cutting cardboard.
- Think about the structure: Cardboard can be used to create a variety of shapes and structures, but it's important to think about the strength and stability of your sculpture. Make sure you create a strong base and consider the weight and balance of your sculpture.
- Experiment with texture: Cardboard can be folded, crumpled, and cut in a variety of ways to create interesting textures and patterns. Experiment with different techniques to see what works best for your design.
- Be open to changes: As you start working with cardboard, you may find that your design needs to be tweaked or changed. Don't be afraid to make changes as you go along.
Step-by-Step Guide to Creating a Cardboard Sculpture
Now that you have your tools and materials and a plan for your sculpture, it's time to start creating. Here's a step-by-step guide to help you get started:
- Sketch out your design: Use a pencil and paper to sketch out your design. This will help you visualize your sculpture and make any necessary changes before you start cutting cardboard.
- Gather your materials: Collect your cardboard, scissors, glue, ruler, and pencil.
- Cut out your pieces: Use your scissors and ruler to cut out your pieces of cardboard. Be sure to measure twice and cut once to ensure accuracy.
- Fold and shape your pieces: Use your fingers to fold and shape your cardboard pieces into the desired shapes and textures.
- Glue your pieces together: Use your hot glue gun to glue your pieces of cardboard together. Be sure to apply the glue sparingly and hold the pieces together until the glue dries.
- Repeat steps 3-5: Continue cutting, folding, and gluing your pieces of cardboard until your sculpture is complete.
- Paint and finish your sculpture: Once your sculpture is complete, you can paint it or add any finishing touches you like.
- Display and enjoy your sculpture: Display your sculpture in a prominent place where you can enjoy it and show it off to your friends and family.

Finishing and Painting Your Cardboard Sculpture
Once your cardboard sculpture is complete, it's time to add the finishing touches. You can paint your sculpture using acrylic or spray paint. Be sure to let the paint dry completely before handling your sculpture.
You can also add other materials to your sculpture, such as beads or feathers, to create a more textured and interesting surface.
Displaying and Preserving Your Cardboard Sculpture
To preserve your cardboard sculpture, it's important to keep it away from moisture and direct sunlight. You can display your sculpture on a shelf or table, or hang it on a wall using a picture hanger or hook.
If you want to protect your sculpture from dust and dirt, you can cover it with a clear plastic sheet or display case.

Inspiring Examples of Cardboard Sculptures
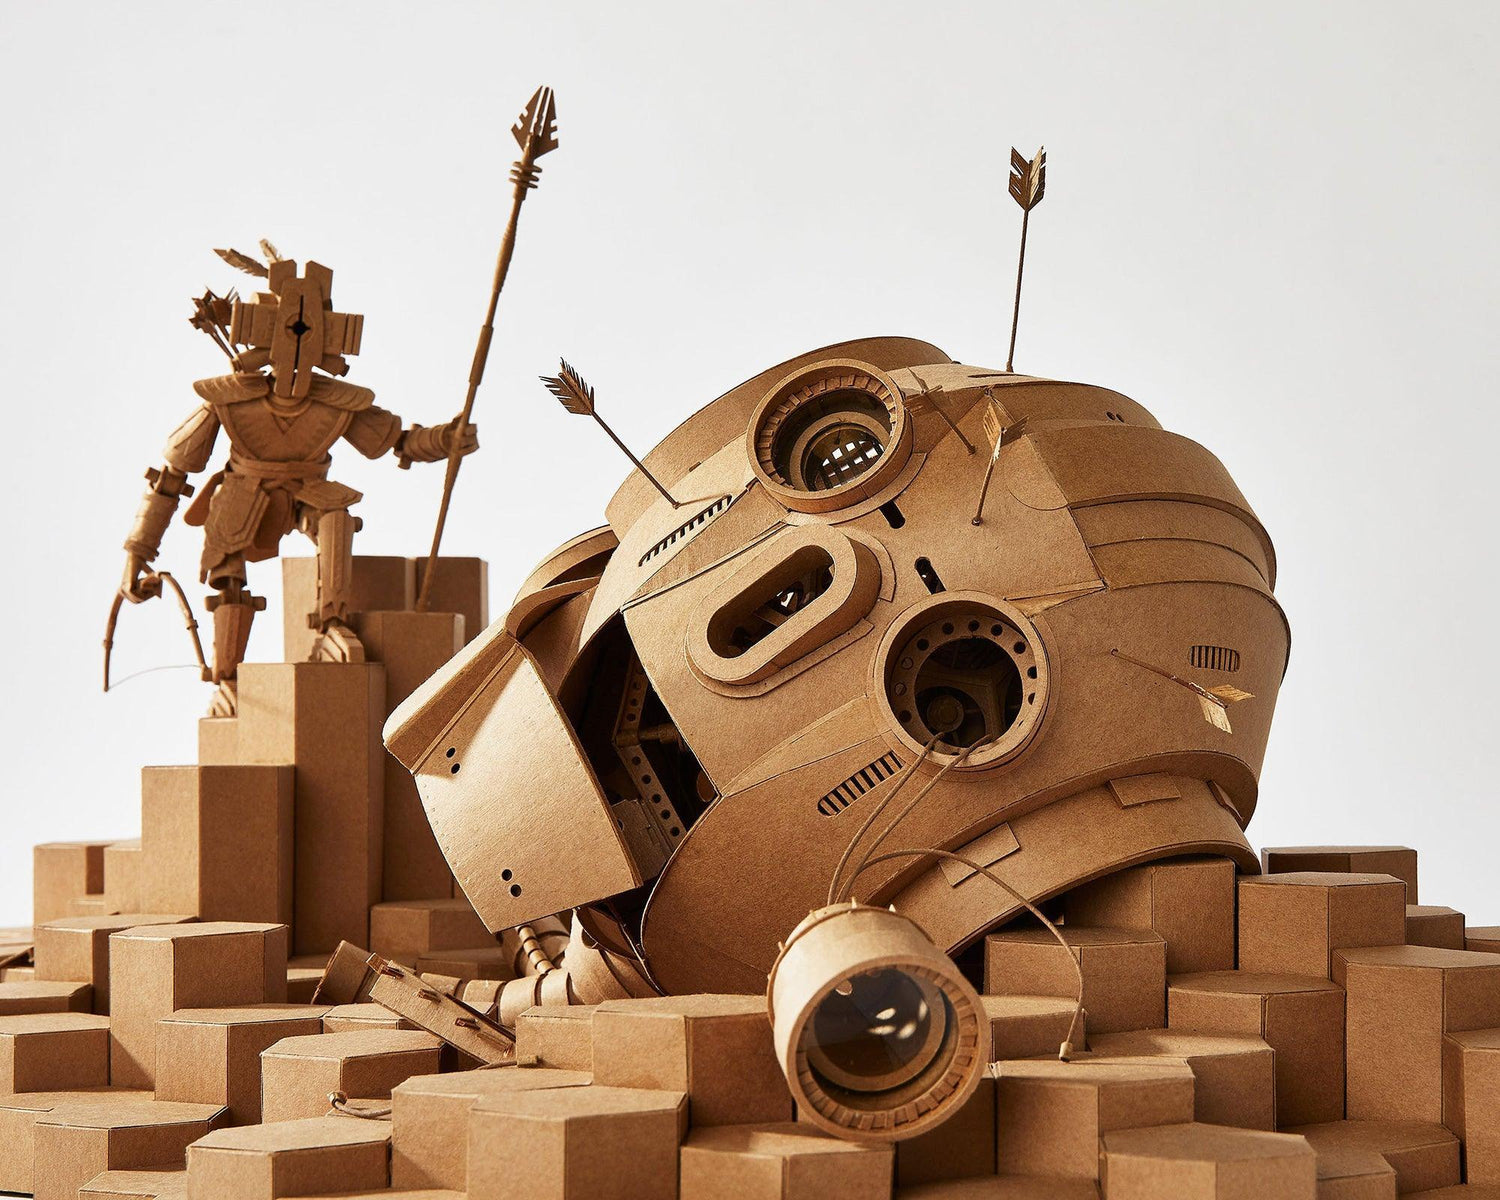
If you're looking for inspiration for your own cardboard sculpture, there are plenty of amazing examples out there. From life-sized animals to intricate architectural models, cardboard can be used to create just about anything. Some of the most impressive examples of cardboard sculptures include:
- A life-sized elephant made entirely out of cardboard
- A replica of the Taj Mahal made out of cardboard
- A detailed model of a city skyline made out of cardboard
- A large-scale dragon sculpture made out of cardboard and paper mache

Conclusion
Cardboard sculpting is a fun and accessible way to unleash your creativity and produce beautiful works of art. With just a few simple tools and some imagination, you can create stunning sculptures that will impress and amaze your friends and family. Whether you're a seasoned artist or a beginner looking to try something new, cardboard sculpting is a great way to express your creativity and have fun in the process. So grab some cardboard, scissors, and glue, and start creating your own cardboard masterpiece today!
Leave a comment
All comments are moderated before being published.
This site is protected by reCAPTCHA and the Google Privacy Policy and Terms of Service apply.