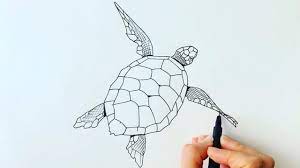
As a beginner artist, learning to draw animals can be a fun and rewarding experience. If you're looking to improve your drawing skills and add a new subject to your repertoire, why not try drawing turtles? These fascinating creatures have unique shapes and textures that make for an interesting and challenging subject. In this article, I will share my tips and techniques for mastering the art of turtle drawing.
Introduction: Why Draw Turtles?
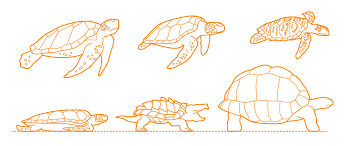
Turtles are fascinating animals that have captivated humans for centuries. They have a unique appearance and behavior that make them an interesting subject for artists. Some species of turtles have colorful shells and patterns, while others have wrinkled skin and bumpy texture. Turtles are also known for their slow movement and calm demeanor, making them an ideal subject for practicing patience and attention to detail.
Anatomy of a Turtle: Understanding the Basic Shapes and Proportions
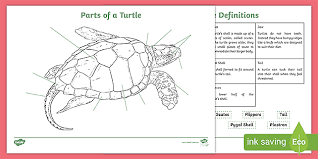
Before you start drawing a turtle, it's important to understand its basic anatomy. Like all living creatures, turtles have a specific body structure that can be broken down into basic shapes and proportions. The shell of a turtle is made up of two parts: the carapace (upper shell) and the plastron (lower shell). The carapace is typically oval or round in shape, while the plastron is flat and rectangular.
The head of a turtle is also made up of basic shapes. The top of the head is round, while the bottom is more angular. The mouth is situated in the front of the head, and the eyes are located on either side. The legs of a turtle are short and stubby, and the feet have webbed toes. By breaking down the turtle's anatomy into these basic shapes and proportions, you can more easily draw it in a realistic manner.
Materials for Turtle Drawing: Pencils, Paper, and Other Supplies
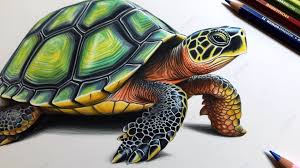
To draw a turtle, you will need a few basic supplies. The most important of these is a pencil. You can use any type of pencil, but a graphite pencil with a soft lead (like a 2B or 4B) will give you more control and shading options. You will also need paper – any type of drawing paper will do, but a heavier weight paper will hold up better to erasing and shading.
Other supplies that you may find helpful include an eraser, a sharpener, and a ruler. An eraser will allow you to correct mistakes and adjust your drawing as needed. A sharpener will keep your pencil sharp and precise. A ruler can be used to measure proportions and ensure that your drawing is accurate.
How to Draw a Turtle Step by Step: A Beginner's Guide
Now that you have your materials, it's time to start drawing your turtle. Here is a step-by-step guide for drawing a basic turtle:
Start by drawing the basic shape of the carapace (upper shell). The shape should be oval or round, depending on the species of turtle you are drawing.
Next, draw the plastron (lower shell) as a flat, rectangular shape.
Draw the head as a round shape on top and an angular shape on the bottom. Add the mouth and eyes.
Draw the legs as short and stubby, with webbed toes.
Finally, add any details, such as patterns on the shell or wrinkles on the skin.
Remember to take your time and use light, gentle strokes with your pencil. You can always go back and darken the lines later. Don't worry if your first attempt isn't perfect – practice makes perfect!
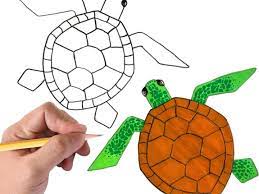
Easy Turtle Drawing Techniques: Tips for Simplifying the Process
Drawing a turtle can be a challenging task, especially for beginners. However, there are some easy techniques that you can use to simplify the process. Here are a few tips to help make your turtle drawing easier:
Start with basic shapes: As mentioned earlier, breaking down the turtle's anatomy into basic shapes can make it easier to draw. Start with simple shapes and then build up to the more complex details.
Use reference images: Look at pictures of turtles to get an idea of their shape, texture, and patterns. You can also use these images as a reference while you draw.
Practice shading: Shading can add depth and dimension to your drawing. Experiment with different shading techniques to see what works best for you.
Don't be afraid to make mistakes: Remember that drawing is a learning process. Don't get discouraged if your drawing doesn't turn out the way you want it to. Keep practicing and trying new techniques.
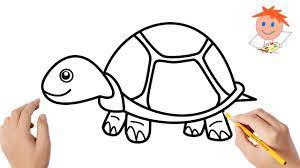
How to Draw a Sea Turtle: Tips and Tricks for Creating a Realistic Sea Turtle
Sea turtles are a popular subject for artists, with their unique shell patterns and sleek, streamlined bodies. Here are some tips for drawing a realistic sea turtle:
- Start with the basic shapes: As with any turtle, start by drawing the basic shapes of the carapace, plastron, head, and legs.
- Add details: Sea turtles have unique patterns on their shells. Look at reference images to get an idea of the patterns, and then add them to your drawing.
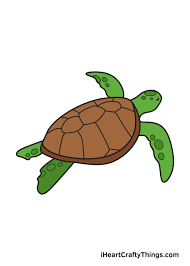
- Draw the flippers: Sea turtles have large, powerful flippers that help them swim. Pay attention to the shape and size of the flippers, and make sure they are proportional to the rest of the body.
- Add shading: Shading can help give your sea turtle drawing depth and dimension. Use light, gentle strokes to add shading to the body, shell, and flippers.
Turtle Drawing Easy: Simplified Methods for Beginners
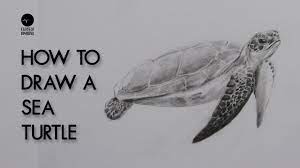
If you're looking for an even easier way to draw a turtle, here are some simplified methods that you can try:
- Draw a cartoon turtle: Cartoon turtles are simple and fun to draw. Start with a basic oval shape for the body, and then add the head, legs, and tail.
- Use simple shapes: Instead of drawing the turtle's anatomy in detail, use simple shapes to represent each part of the body. For example, the shell can be represented by a simple oval shape, and the legs can be represented by short, straight lines.
- Draw a turtle outline: Instead of drawing the entire turtle, draw just the outline of the shell and legs. This can be a quick and easy way to create a simple turtle drawing.
Turtle Drawing Simple: Minimalistic Approaches for Quick Sketches
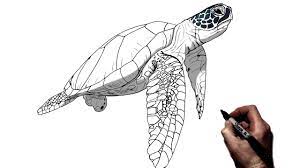
If you're short on time or just want to create a quick sketch of a turtle, here are some minimalistic approaches that you can try:
- Draw a silhouette: Instead of drawing the details of the turtle, draw just the outline of the body and shell. This can create a striking and simple image.
- Use cross-hatching: Cross-hatching is a shading technique that involves drawing intersecting lines to create texture and depth. You can use cross-hatching to quickly add shading to your turtle drawing.
- Draw a turtle face: Instead of drawing the entire turtle, focus on drawing just the head and face. This can be a quick and easy way to create a simple turtle drawing.
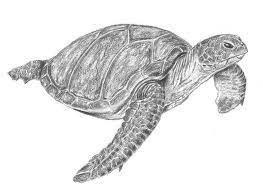
Drawing Turtles from Pictures: Techniques for Using Reference Images
One of the best ways to improve your turtle drawing skills is to use reference images. Here are some techniques for using reference images effectively:
- Look for multiple images: Don't rely on just one image for your reference. Look for multiple images from different angles and in different poses to get a better idea of the turtle's anatomy and behavior.
- Use a grid: A grid can help you accurately reproduce the proportions of the turtle in your drawing. Use a ruler to draw a grid over the reference image and then recreate the grid on your drawing paper.
- Trace the image: While tracing may not be the best way to learn to draw, it can be a useful tool for beginners. Trace the reference image to get a feel for the turtle's shape and proportions, and then try drawing it freehand.
Conclusion: Keep Practicing and Enjoy the Process
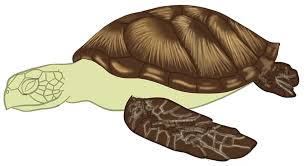
Drawing turtles can be a fun and rewarding experience for beginners and experienced artists alike. By understanding the turtle's anatomy, using the right materials, and practicing different techniques, you can improve your drawing skills and create beautiful turtle drawings. Remember to take your time, use reference images, and most importantly, enjoy the process!



Leave a comment
All comments are moderated before being published.
This site is protected by hCaptcha and the hCaptcha Privacy Policy and Terms of Service apply.